No two advisory firms are alike. That’s why we’ve built plenty of ways for you to customize Orion technology to better fit your business—and not the other way around.
And we’re continuing to innovate new customization options to help your business succeed; like our reimagined Orion Connect user interface, which will allow you to personalize your Orion home experience and better prioritize your day.
For this week’s Tech Tip, we will walk you through exactly how to create your own custom fields in Orion Connect.
[bctt tweet="Creating Custom Fields in Orion Connect Helps Advisory Firms Meet Unique Needs." username="orionadvisor"]
What are Custom Fields?
Custom fields are available within the Portfolio Audit, Reporting, and Query apps within Orion Connect to help organize and keep track of unique identifiers.These identifiers can be set up at the Representative, Household, Registration, Account or Product level.
Some common examples of when you would want to create a custom field include:
- The margin of an account
- Tracking another third grouping for products: Orion already has Asset Class and Asset Category, but some advisors want to track a third grouping.
- Document tracking: Some advisors want to track when they send or receive specific documents from a client.
View Existing Custom Fields
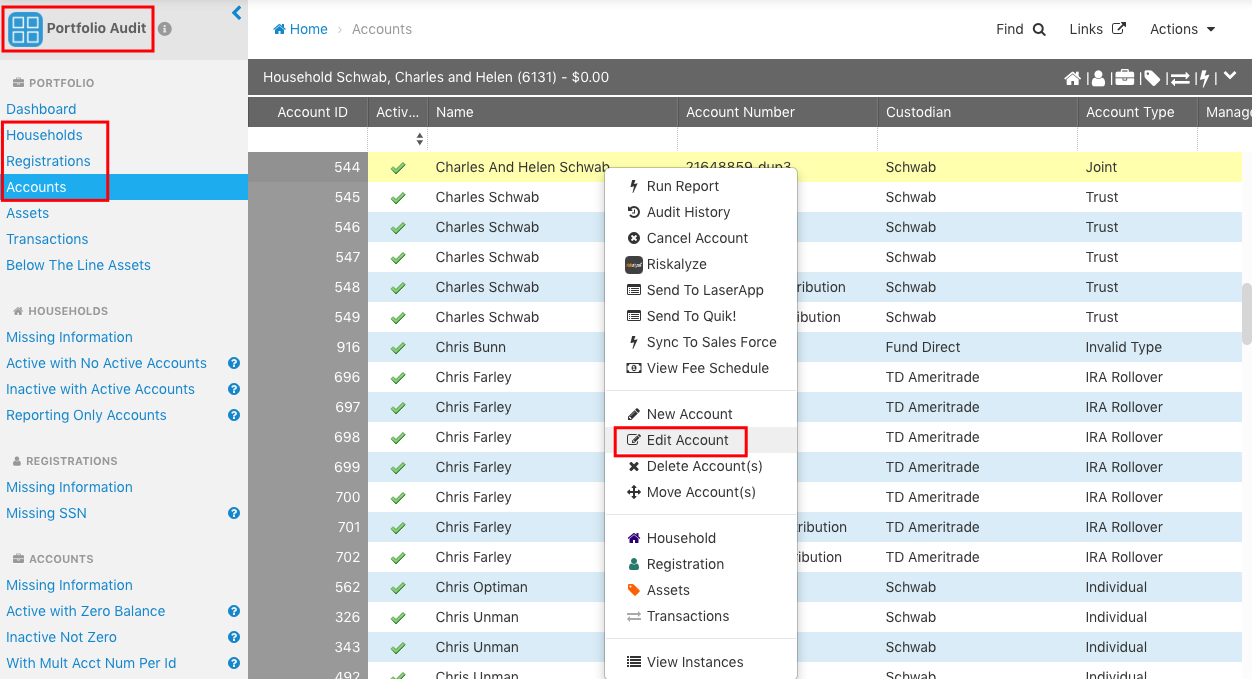
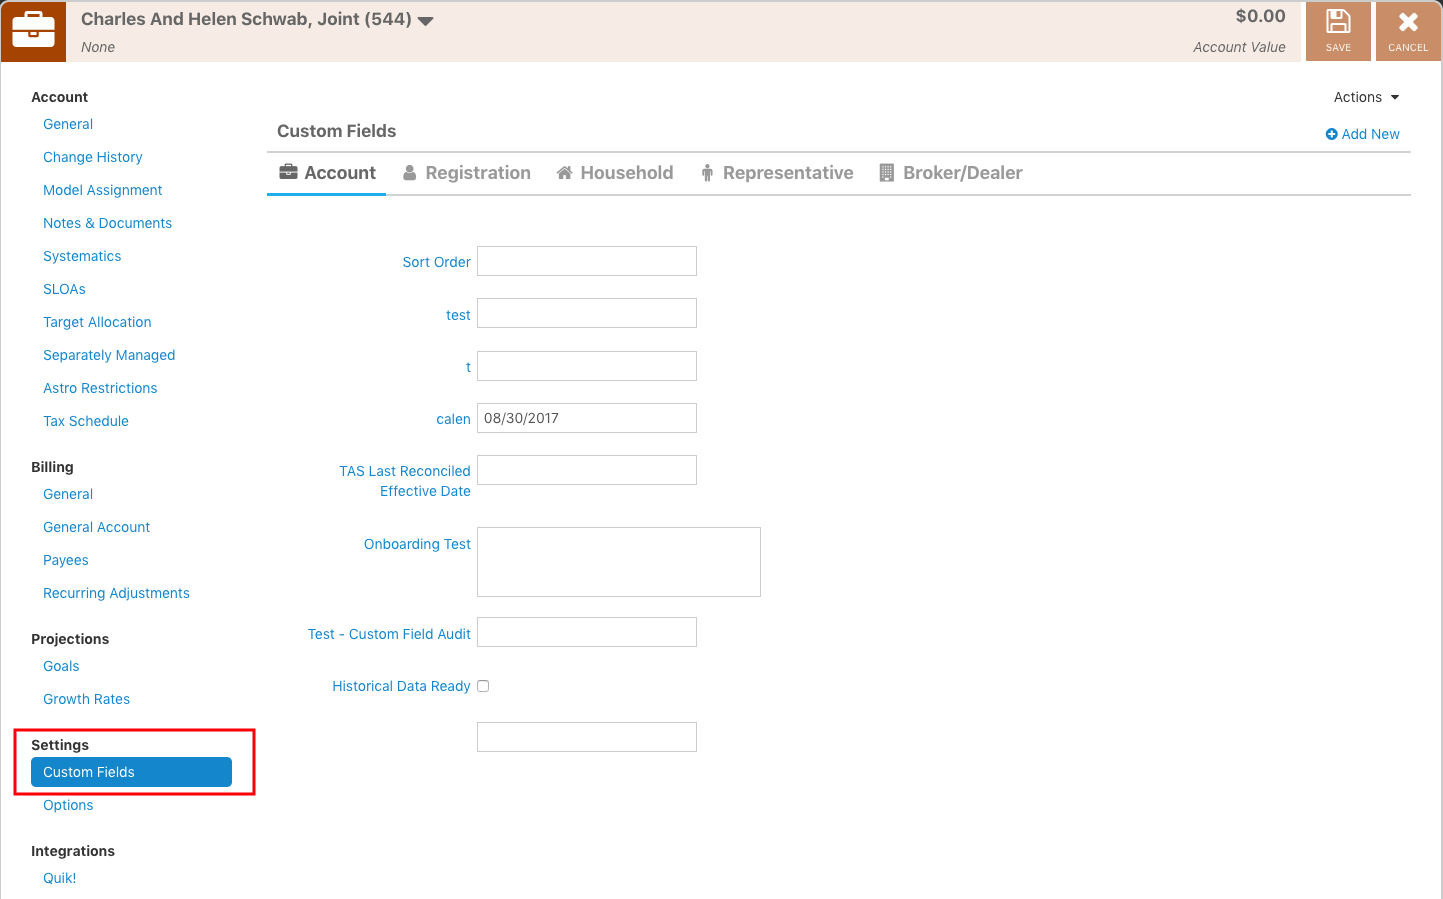
Before you create a custom field, it is best practice to review already existing custom fields to ensure there is no redundancy.To view existing custom fields, go to the Portfolio Audit App and follow these steps:
- Choose the “Household,” “Registration,” or “Account” level
- Find the item from the list.
- Right-click to edit.
- Choose “Custom Fields” on the left-hand side.
How to Create a Custom Field
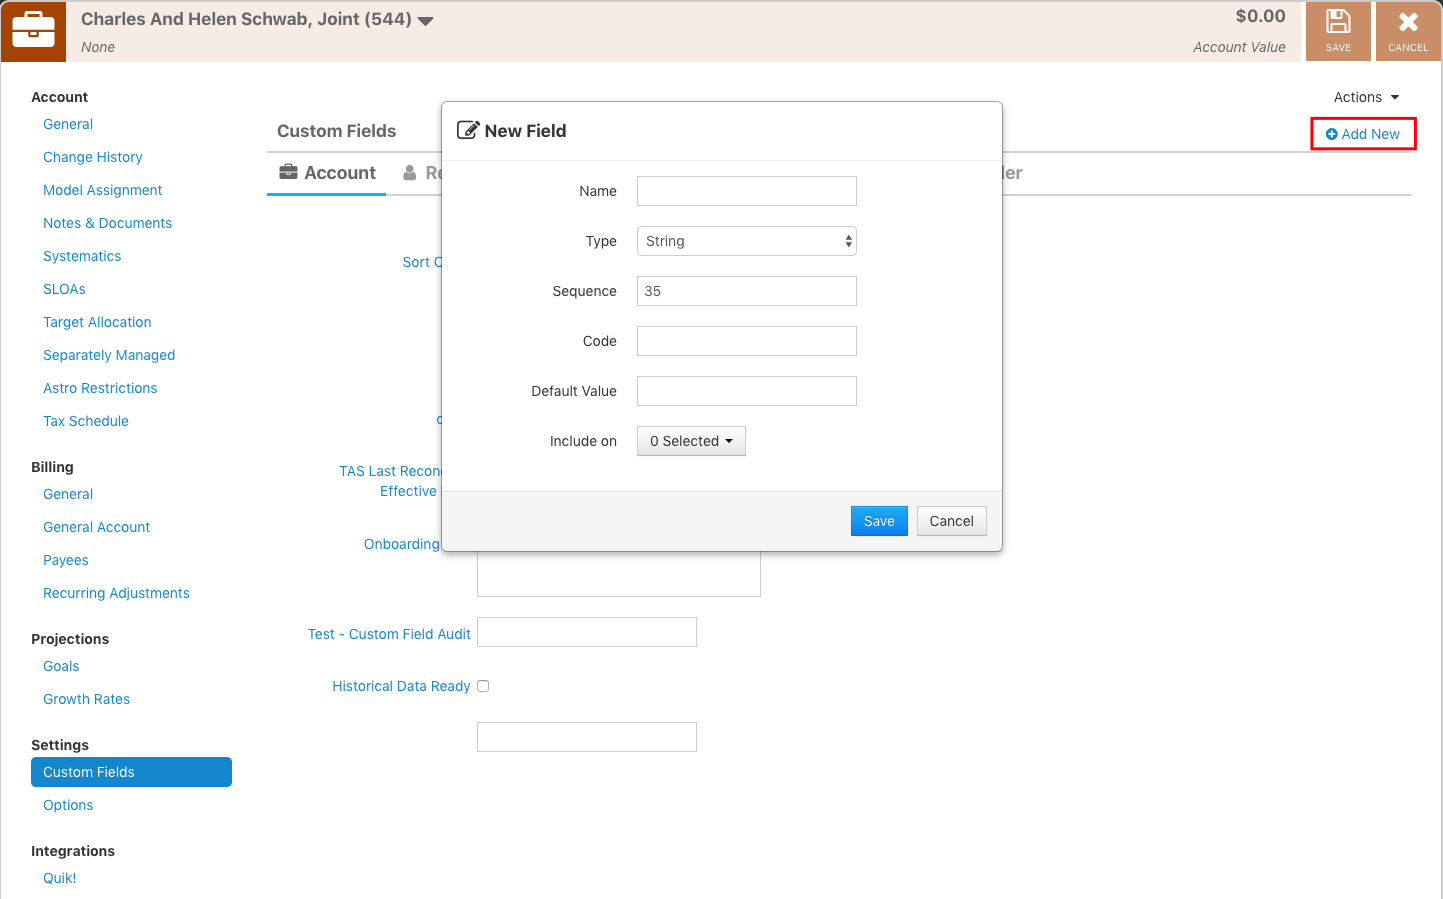
The navigation steps for creating a custom field are the same as listed above for viewing existing fields.After you are in the “Custom Fields” section of the household, registration or account, you will then click “Add New” in the top right-hand corner. This will then open a pop-up box.
Now, you will fill out the fields.
- Name: Choose a name for the custom field that will be used to describe/identify what the custom field is being used for.
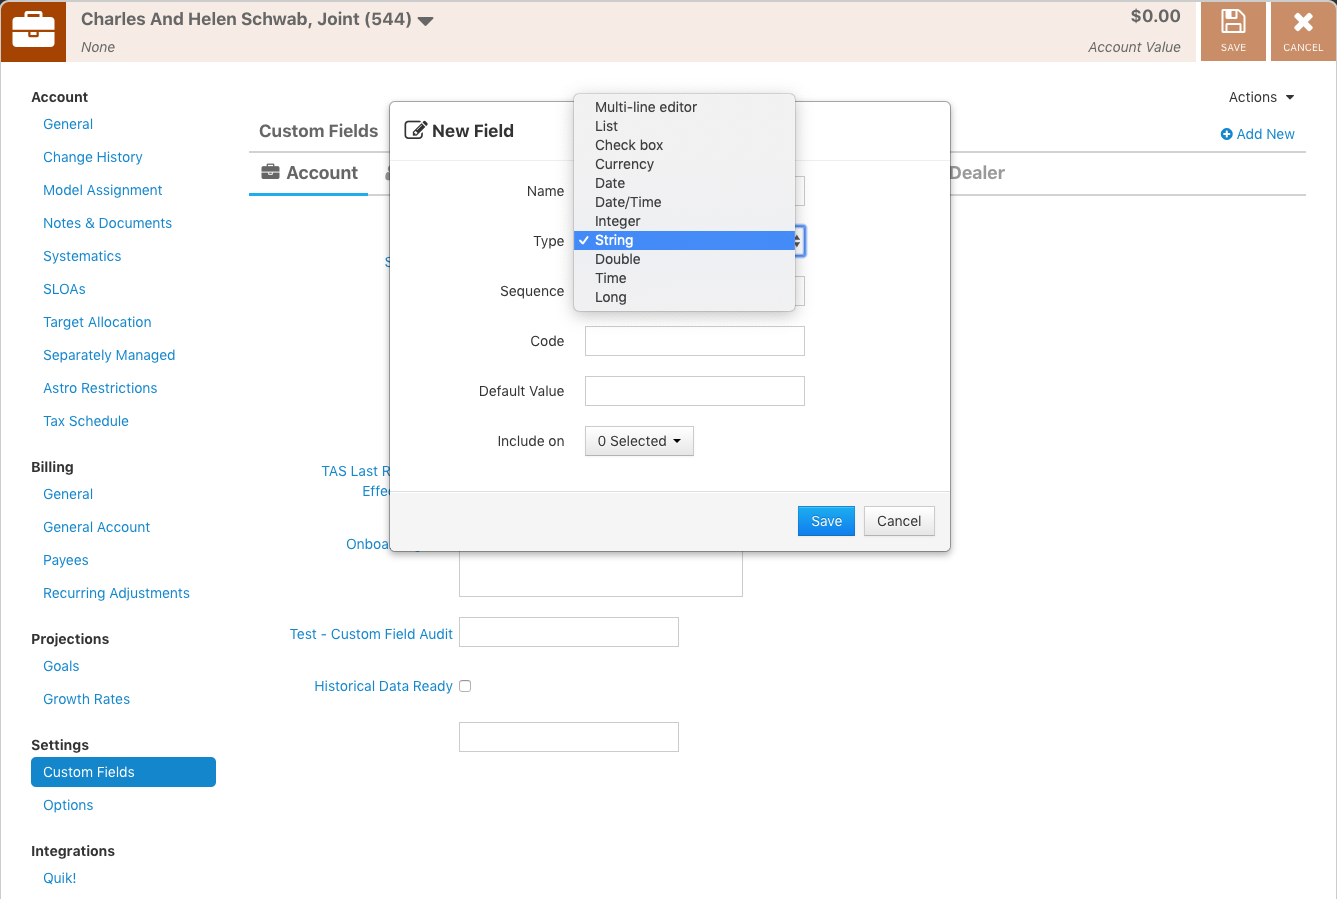
- Type: There are 11 options to choose from for type
- Multi-line editor: Provides the ability to provide a longer explanation/value
- List: Create a list of the available options to pick from
- Check box: Creates a true/false option
- Currency: Option to add a dollar value
- Date: Choose a specific date
- Date/Time: Choose a specific date and/or time
- Integer: Ability to input a number value
- String: Open field where anything can be populated
- Double: Ability to input a number value
- Time: Input a time of hours and minutes to populate
- Long: Ability to input a number value
- Sequence: Determine the order that the custom field should populate when looking at all of the various custom fields that have been created for a particular entity level. For example, if there are five different custom fields created at the household level, the sequence would control the order that all five custom fields would population.
- Code: This is an abbreviation you must create and enter in order to save the custom field. You will need this code to use with the new Salesforce sync.
- Default Value: Use this field if you want your document field to be checked by default or your product grouping automatically unassigned.
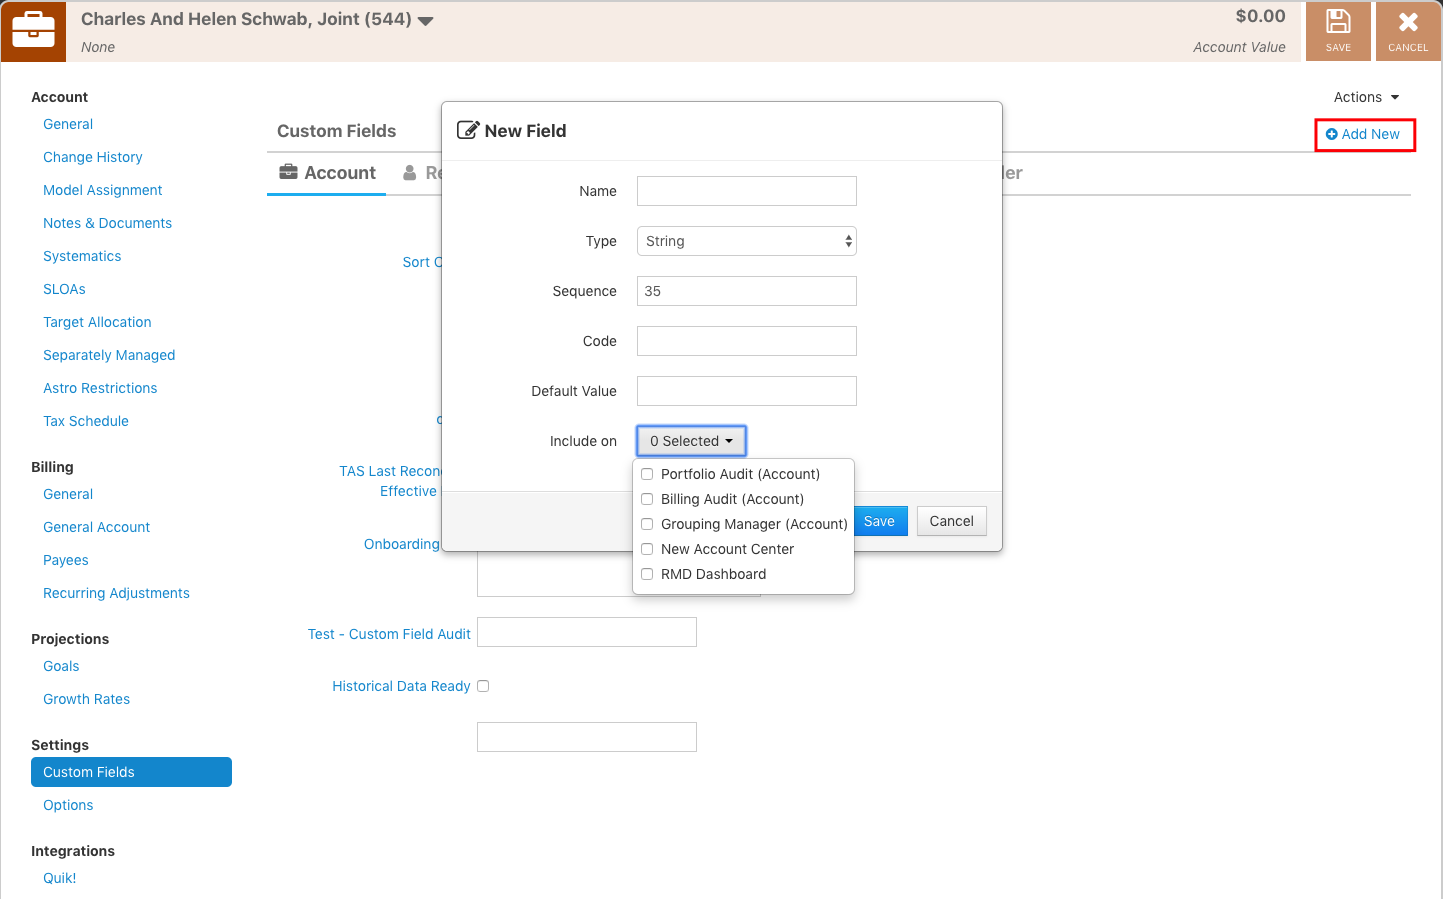
- Include On: Determine which apps within Orion the custom fields can be used in. For example, if you select “Portfolio Audit” then you can add that custom field as a column.
For more information on viewing, creating, and using custom fields, contact the Orion Platform Support Team.
0641-OAS-3/16/2020

